Guide d'installation des carreaux Colamo
Puis-je vraiment poser vos carreaux moi-même, même si je n'ai que peu ou pas d'expérience en bricolage ?
You absolutely can!😊 At Colamo, we believe transforming your space should be an exciting and hassle-free journey, not a daunting task. Just follow our clear guidelines and helpful tips, and you'll be amazed at the stunning results you can create.
1. Assurez-vous que la surface est plane, sèche et exempte de poussière et de débris.
Est-ce que cela se pose sur un carrelage existant ?
Oui ! 🙋♀️Nos carreaux sont dotés d'un noyau rigide et sont suffisamment épais pour recouvrir naturellement les joints de carrelage profonds.
Cependant, essayez de vous assurer que la surface est aussi plane que possible. Si vos carreaux existants ont une texture, nous vous recommandons de poncer légèrement la surface.
Pour une sécurité accrue sur les surfaces inégales, vous pouvez ajouter de l'adhésif, comme un adhésif en aérosol ou des clous liquides, pour assurer une bonne adhérence.
Avant l'installation, utilisez un nettoyant tout usage pour éliminer toute graisse ou résidu. Assurez-vous toujours que la surface est sèche et exempte de poussière pour garantir la meilleure adhérence.
Can I install peel and stick tiles on textured walls (like orange peel)?
For best results, a smooth and flat surface is always recommended.
However, our peel and stick tiles can still be installed on lightly textured walls, such as orange peel. We’ve had many customers successfully apply them directly without sanding.
What to expect:
- Minor Gaps: On textured surfaces, you may notice that some tiles don’t sit perfectly flush—this is normal. A simple fix is to apply silicone caulk (just like grout) between the tiles. This helps fill small gaps and creates a cleaner, more finished look.
- Extra Security: If you are concerned about the wall texture affecting the bond, applying a bit of spray adhesive (such as 3M Super 77) to the wall before installation can provide extra peace of mind and ensure the tiles stay firmly in place.
Ai-je besoin d'outils spéciaux ou de coulis pour l'installation ?
Pas besoin d'outils spéciaux ni de joints salissants ! Le design unique à bords chanfreinés de Colamo offre la flexibilité d'une belle installation sans joint traditionnel. Bien que notre design avec joints crée déjà l'apparence élégante d'un carrelage calfeutré sans les inconvénients, le jointoiement reste un choix personnel pour ceux qui le préfèrent, et certains clients l'ont appliqué avec succès.
Pour la coupe, un couteau universel et une règle sont généralement tout ce dont vous avez besoin.
Comment préparer ma surface murale avant la pose des carreaux ?
Il est crucial de s'assurer que votre surface est plane, sèche et exempte de poussière et de débris pour une adhérence optimale et une finition impeccable. Nous vous recommandons de nettoyer soigneusement la surface et de la laisser sécher complètement avant de commencer votre installation.
Je crains que mon mur ne soit pas suffisamment propre ou plat pour que l'adhésif adhère correctement. Que dois-je faire ?
Les carreaux adhésifs Colamo sont conçus avec un adhésif puissant et fiable qui adhère parfaitement aux surfaces propres, planes, sèches et sans poussière. Compte tenu de vos préoccupations, certains clients trouvent qu'un adhésif en spray supplémentaire peut offrir une sécurité accrue, en particulier pour les surfaces extrêmement poreuses, inégales ou difficiles à nettoyer. Cependant, la meilleure pratique pour une adhérence optimale reste de s'assurer que votre mur est parfaitement nettoyé et préparé.
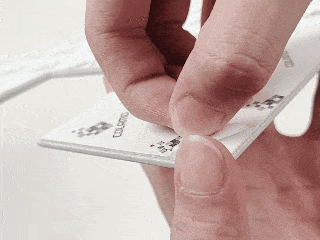
2. Point de coupe facile
Le secret pour une coupe facile et précise est la technique de rainurage et de rupture, et non la coupe directe.
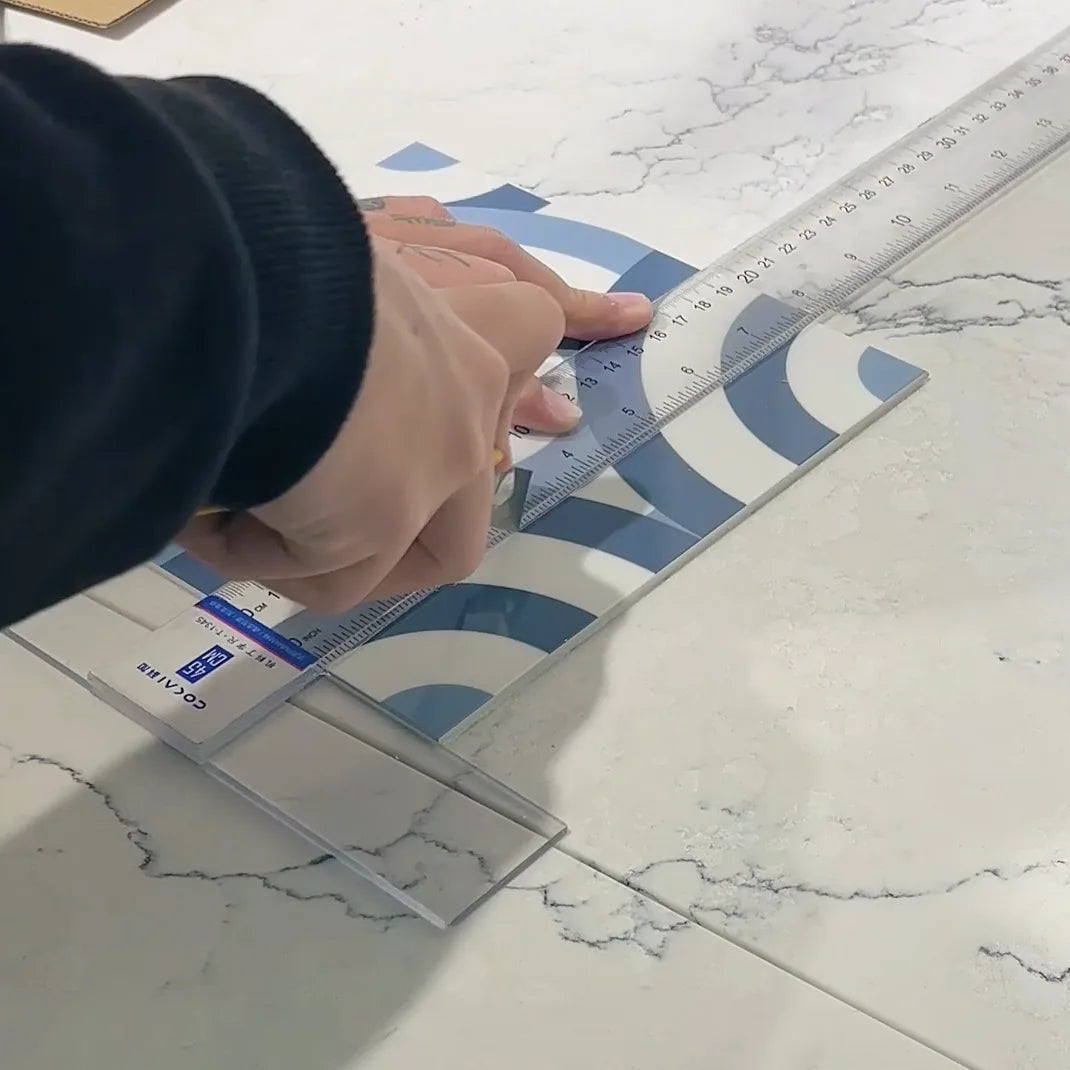
Marquez votre ligne avec précision
Utilisez une règle droite ou un autre bord droit similaire. À l'aide d'un couteau universel bien aiguisé, marquez délicatement une ligne droite sur la surface du carreau. Repassez le couteau le long de la ligne plusieurs fois – il n'est pas nécessaire d'appuyer trop fort, car vous ne faites qu'une entaille et n'essayez pas de couper le carreau ! Le but est simplement de créer une ligne d'entaille visible et nette.
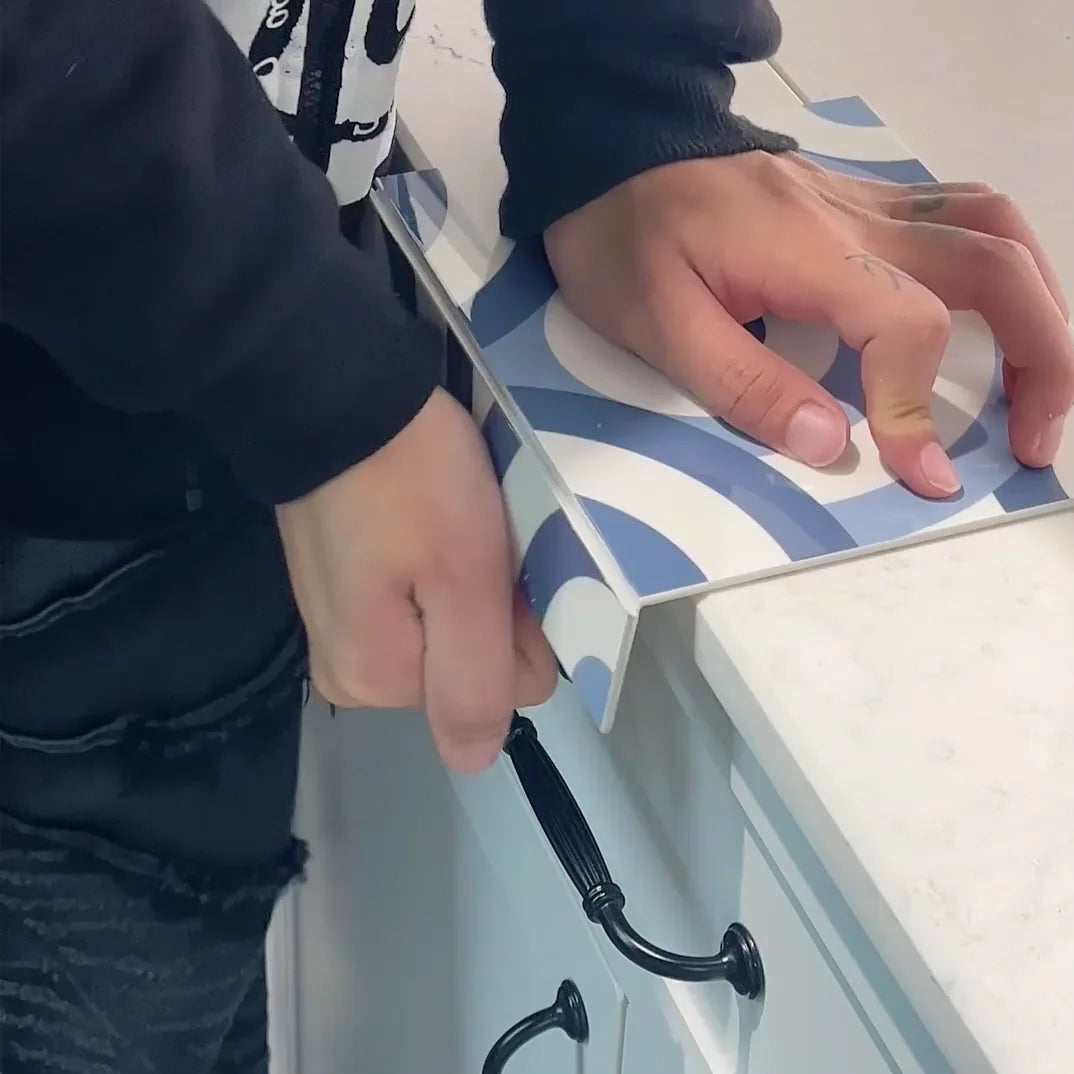
Le Nettoyage Rapide
Maintenant que la ligne de coupe est tracée, placez le carreau le long du bord d'une table droite ou d'une surface solide, la ligne de coupe étant alignée avec le bord. Appliquez une pression ferme et constante avec votre main d'un côté de la ligne, et le carreau se cassera parfaitement droit là où vous le souhaitez.
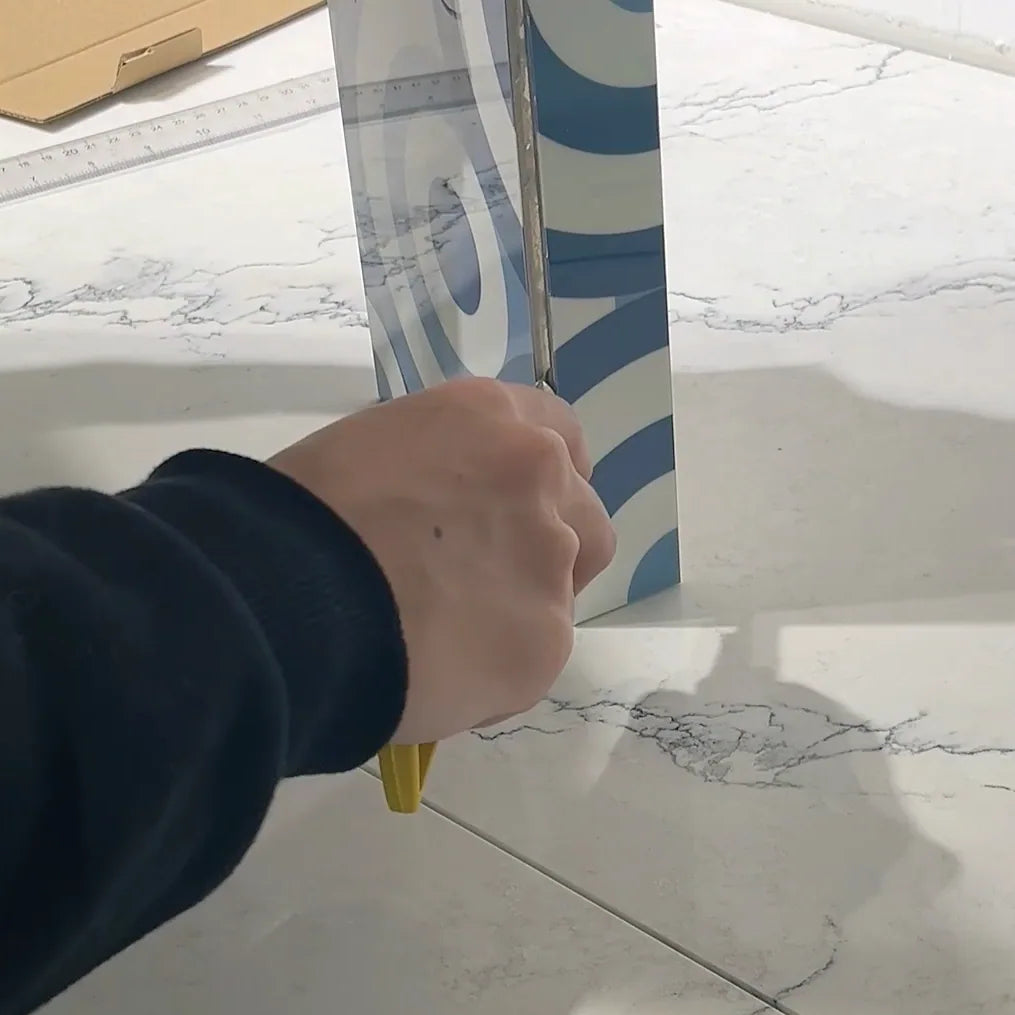
Entièrement séparé
Passez le cutter le long de la ligne de coupe pour séparer complètement le carreau. C'est aussi simple que ça !
Avez-vous une couleur de joint de carrelage recommandée pour remplir les espaces autour des armoires ou des murs ?
Oui ! Pour les espaces restreints, nous vous recommandons d'utiliser du mastic sablé (au lieu du coulis) car il reste flexible. Les couleurs génériques « Gris clair », « Argent » ou « Givre » s'harmoniseront parfaitement avec les joints des carreaux.
Comment poser du carrelage sur un angle extérieur ?
Il vous suffit d'abord d'installer les carreaux entiers dans le coin extérieur. Parce que nos carreaux sont dotés d'un design à bords biseautés, l'installation est en fait beaucoup plus sûre que vous ne le pensez !
Si vous regardez le profil du bord, il ne crée pas de pointe nette à 90 degrés. Au lieu de cela, il forme une transition douce et plate à 45 degrés dans le coin.
Comment retirer les tuiles ?
Voici la méthode la plus sûre :
1. Chauffer : Utilisez un sèche-cheveux à haute température pour réchauffer la surface du carreau.
2. Commencer par un coin : Utilisez un couteau à mastic pour soulever un coin.
3. Retirer lentement : Tirez doucement sur le carreau tout en dirigeant la chaleur vers la zone que vous décollez.
